onsdag 25. november 2015

VFX2 - Render elements and layers

Getting tired of visual effects...

This week I'm going to finalize my simulations from last week and RENDER the scene out in pases.
Need to learn some things to make this happen. Next week I will composite them all together and adjust them to get the best visual result.

I started this week with research. Trying to make my flames better than what they were. And I managed to make them pretty nice! at least I am satisfied. I'm not searching for the CG prefect. I'm a newbie who are trying my best to pass this class. And so far I'm doing an OK job I think!

The render passes we needed for this week was Ambient Occlusion, Beauty pass, Multi-Matte Pass and z-Depht pass. So research, research and more research. Got it to work and ended really satisfied with the final result!
I do not have any final images or anything to show you, because of the file type I am using to make this. It makes it harder to give you anything to see. But I got one printscreen from my post production in NUKE (A new program we are using now) so you can see how it will be and have a look at the new program.

peace out


VFX1 - Particles & Dynamics

And now everything is changed! 

Because over the next three weeks we are going to work on a previous project. We could choose LR1, LR2 or LR3. (See previous blog posts) I chose my environment LR2!

Much research

Had to do much research and watch quite a few videos before I was ready to do this week. But somehow I managed to make it. I failed so much on the fire I made but I figured since we were going to use three weeks on this stuff I would leave it like that until I've learned more about it. 

Not much to say about this week. Was mostly just tweaking settings getting everything the way I wanted so I can continue more next week. So the shortest blog post ever incoming. 

This is my final result! 
**THIS IS ONLY A PLAYBLAST!! That's why the quality and everything is WRONG**

LR4 - Light and render the fish

Lighting and rendering the fish


Busy week! Because I know that the render will take time. And there is so many things we're going to do this week that I do not know anything about. But let's take a look and see how it goes. 

Process

I started with researching underwater scenes and figuring out what made it look like a underwater scene. Figured out how lights would work. Had a lot of lectures learning about volumetric lights and fog and fake caustics etc. Once I was sure I figured out all the technical stuff I started working with my scene and made the seabed and everything. I made a "Godray Light" It is basically a spot light that I'm not allowing all the light to come out from. But to see the godrays the way I wanted I had much work ahead. Because now I started making the fog. It was so hard to make and I was so freaking proud when I finally managed to do it. And because I managed to do it, and since I used so much time and tried so many things, I learned so much! I was able to help multiple of my classmates with theirs also because of that. And it was so much fun learning others. It was much stress and much BS but in the end I'm really satisfied with everything I learned. 

In the end

After this week I've learned much and I understand much more. I'm very happy with my final render. and now you have to tell me what you think. 

T04 - Texturing your fish

Time to texture the fish. 

As always after done a model or object it is time to put some textures on the fish. It's critically important that you did a good job last week to save yourself a lot of trouble. I had my problems, but fortunate for me it was not any big problems. Now let's take a look at this week. 

Time budget

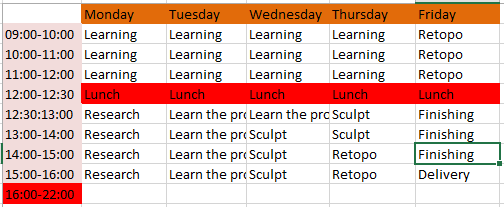
yeah not much to say about this part.

Moodboard

So I continued a bit on my moodboard, not much because I already had much of what I needed.
Basically what you see is what you get. made the textures very much like it is on the picture. 

What and how I made it


This is all the maps I made for that week. Its NOT optimal at all, and I have gotten much feedback about this. I know now easier ways to make it better. 
I made the UV's and added a Checker map to make sure the uv's are nice and optimized. 
Most of this are actually made in mudbox. I painted on the details and at the time I was satisfied with my work. But I see now that most of this could be done better. 
The normal map is made in xNormals. Very nice program. 

This is also my final image so yeah what do you think?

M04 - Sculpting a fish in Zbrush

Assignment overview

  1. Analyze the challenge and the scope of the assignment
  2. Estimate how many hours you will spend and create a time-budget.
  3. Collect reference images for different fishes and chose one to model
  4. Sculpt the fish
  5. Retopologize your model manually
  6. Render clay renders of the sculpted model from 2 perspective views
  7. Render shaded wireframe images of the retopologized model from 2 perspective views
  8. Write a work-log that includes a time budget, research and work process
So yeah this is basically the assignment broken down to a list. So let's go trough some of it.

Analyze the challenge and the scope of the assignment. 

So this week we had to make a fish in a totally new program (for me) and it was HARD. The logic that we have learned in Maya  over the last months is NOT applied to zBrush AT ALL. It took a load of time to understand that program and make it work the way I wanted to so I could even START making that fish. 

This is zBrush. 

Estimate how many hours you will spend and create a time-budget

Not much to say about this. Didn't go just like this but very close and it always helps to have a plan.

Collect reference images for different fishes and chose one to model

I did this in the research phase and struggled to make a decision but ended with a Piranha.
Here is my references gathered into one moodboard. Not all my references made the cut. 

Sculpt the fish

The time had come and I started making sence of the program and after much struggle I finally started to make the fish the way I wanted to. 

I dont want to go closer on to all the steps but this is my final image. On the left is the sculpted model and on the right is the retopologized model. I tried to get the flowlines running, Kinda messed up the mouth but now after that I'm finished with the assignment I do know how I could make this much better.